1) Installing Apache tomcat in Windows
Step1: First Install java development kit in Your PC from this linkJDKFIle
After installation Set a path to Your Jdk by seeing below
Go to Control Panel\System and Security\System:
then on the left side on your menu bar Press: Advanced System Setting
And the below will be displayed.
1) Set the Variable name :JRE_HOME
Set the Variable value: depending on the location of your JDK folder
and then press ok.
2) Set another new environment variable
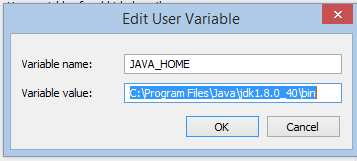
Variable name : JAVA_HOME
Set the Variable value: depending on the location of your JDK folder/bin/
and then press ok.
Step2: Install Apache Tomcat in ur PC from this below link
if Your PC configuration is 32 or 64 bit download :
Core:
Step3:UNZIP the tomcat zip file and s
et the extraction location to C:/
Step4:
3) Set another new environment variable
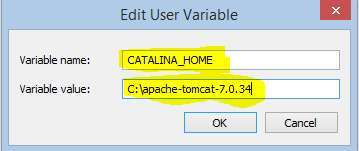
Variable name : CATALINA_HOME
Set the Variable value: depending on the location of your tomcat folder
which will be displayed on the addressbar
which will be displayed on the addressbar
and then press ok.
4)Even make this another variable to avoid problems while starting your
tomcat server
Variable name:CLASSPATH
variable location:C:\apache-tomcat-7.0.34\lib\servlet-api.jar
And the Apache tomcat web server is installed on Your PC.


